Preparing for West Coast Craft

I'm knee deep in preparations for West Coast Craft next weekend.  I can't believe it's almost here!

I'm making a lot of one-of-a-kind items for my booth.  Here's a sneak peek:

Please join me next weekend at West Coast Craft:

Featherweight Studio @ West Coast Craft - Booth F44

June 13th & 14th
10am to 6pm
Festival Pavilion @ Fort Mason Center
San Francisco, CA
FREE & open to the public


Good Crafternoon

Does the word "crafternoon" make you laugh or make you cringe?  It's polarizing.

While I was in Austin, my friend Dana - the brilliant mind behind Lenko - hosted a Crafternoon at the very cool boutique Friends & Neighbors.  

I didn't know what to expect, but I figured it would be a fun time regardless.  The only collage I've done in the last decade(s) ended up being my friend Dave Doobinin's album cover, so I also thought that this would be a good opportunity to force myself to try making another collage.

Dana was a great teacher.  She gave us a brief history of collage, some tips on how to get started, and let us loose with the tools she provided.  In addition to scissors, glue sticks and thick backing paper, she brought a few dozen old books she'd gotten from the thrift store.  I'll admit I felt a little weird about cutting out images from hardback books.  But then I remembered all the books I've seen thrown into the recycle bin (at the hospice thrift store where I volunteered) and I suddenly felt good about giving these old books new life.

Once the class was underway, I spent the first half of the class hunting around for images I liked. I found it very meditative and I sunk into a pleasant silence, not talking much with the group.  I realized that I always do my creative work alone and naturally go into my own inner world when I'm making things.  No one seemed to mind.  After I'd pulled a few dozen images that I liked, I began to silently panic that I wouldn't think of what I'd want to collage.  In hindsight, I find it hilarious that even though this art-making was just for fun, I still managed to be seized briefly by self-doubt.   Note to self: make more art for no reason, and get over self.

After spending some time looking through the images I collected, a concept started to form in my mind.  I created a black and white world and thought I'd put a few black and white figures in it, but I didn't like the figures I'd found.  So I went back to the books and looked for the right size figures for the foreground as well as for some colors for the focal point. The very last piece I found was the bird.  I love that he has a worm in his mouth.

I did eventually interact with my fellow collage makers, especially once I'd figured out my composition and was just doing some (tedious) cutting and pasting.  I loved how everyone went at their own speed, talked as much or as little as they liked, nursed a cocktail or didn't, and by the end we all had the most diverse collages to share.  Mine is below, and you can see the others here.

Even though I'm a mostly solitary maker, I highly recommend doing some social art making.  It was so fun to see what everyone else made, and frankly it forced me to make something I wouldn't have made otherwise.  I'm going to look into more events like these when I get back to the East Bay.

Just before the evening wrapped up, someone stepped outside and discovered a gorgeous rainbow. It all made for a magical evening.  Thanks Dana and Friends & Neighbors!

Small Biz Marketing: 10 Things I Learned at Renegade Craft Fair Austin

I was excited to go to Renegade while I was in Austin, partly to shop and also to do some research for my booth at West Coast Craft on June 13th & 14th.  The fair took place over two days at the Fair Market location in East Austin.  I went on Sunday around noon and it was pretty packed with shoppers when I arrived.  The vendors were also packed in tight; according to Renegade's website, there were over 140 vendors.  With such tight spaces, it was hard to shop in some of the booths, especially the shared booths.

Here are a few things I learned from walking through the fair:

1 ★  Make sure my booth is uncluttered and easy to enter.  If a booth or shared space was too cluttered or if I couldn't tell what they were selling at-a-glance, I just didn't go inside it.

2 ★  Provide a clear sign with my brand name/logo.  As I skimmed by a few booths, I couldn't figure out who they were.

3 ★  Always say hello to people who stop by the booth, but don't pounce on them.  I'm a shy person and am not the best salesperson.  But as a shopper, I can feel the weird vibes of bored, annoyed or scared vendors and it makes me not want to shop.  If a vendor was immersed in their smartphone, or tried to give me the hard sell, I split.  When makers said hello, it made me feel welcome and at ease.

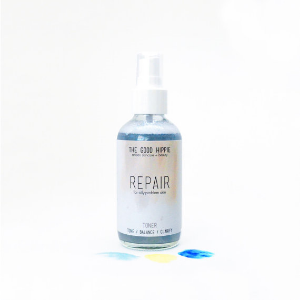
The Good Hippie:  Great packaging, friendly maker, beautiful booth, quality products.  I bought this.

The Good Hippie:  Great packaging, friendly maker, beautiful booth, quality products.  I bought this.

4 ★  Provide a mailing list signup.  I only saw two mailing lists and I signed up on both of them.

5 ★  Make business cards easy to see and grab.  This is helpful for when things are crowded or shoppers are short on time.

6 ★  Bring my originality, it'll help me stand out.  I saw a lot of the same things over and over - there were definite trends that Renegade supported.  I really value originality, so when I saw something original or unusual it really stood out.  

7 ★  It's OK to have several types of products, as long as they're grouped and displayed nicely.  Some booths were easy to scan and understand, others were totally confusing.  It didn't matter how many different types of products they had as long as they were in clear groups and the displays weren't too cluttered.  Extra display tchotchkes just confused me.

8 ★  Price all your items.  I've gone back and forth on wanting to tag and price all my items, and I understand why some people don't want to do it.  But when you're dealing with crowds and can't talk to every customer, your tags can speak for you.

★  Try to offer products in a range of prices. There were a few makers I really loved, but I was on a budget and couldn't afford expensive purchases.  It would have been nice to be able to support them by buying a lower priced item. One maker had the most gorgeous necklaces that were priced fairly but out of my budget, and I wished she'd had some affordable rings or stud earrings so that I could have still purchased from her.

10 ★  Enjoy yourself and have a conversation.  I purchased from three makers, all of whom were really open, relaxed and friendly.  Because I love their products and personalities, I'm going to tell some boutique owner friends about a few of them which might lead to wholesale orders.

Lots of food for thought in preparation for West Coast Craft!  
My Current Breakfast Obsession

I'm not an aspiring chef, and I'm not certainly not a foodie because there are a lot of foods I'm unwilling to try.  I'm a vegetarian so that rules out a lot of things.  

But I love food and I think a lot about it and I've read a lot about it. I really like eating seasonally from the farmers market and growing food when I can. 

I also kind of hate the thought that I have to make food for myself three times a day.

So when I find a delicious meal that is easy to make, tasty enough that I want to eat it every day for awhile, and pretty healthy - well that's just about the best thing ever.

I've found an amazingly simple, tasty and healthy breakfast, but it actually requires some advanced preparation.  But it's simple!  Here's how you do it:

HOW TO MAKE SOAKED BUCKWHEAT

Don't be fooled by its name, buckwheat is a seed and is gluten-free.

  • Buy buckwheat from the bulk aisle of your hippie natural foods store.  Don't get roasted or toasted buckwheat, raw is what you want.
  • Put about a cup of buckwheat in a bowl and cover it with plenty of water, because the buckwheat groats will expand as they soak.  Let it soak for at least 30 minutes but not more than a day.  I leave it overnight.
  • Now you rinse. Get a sieve and rinse off your buckwheat, rinse a few times.  You'll get a lot of starchy, viscous stuff during initial rinses, but when the water's looking clear, they're ready.
  • You can store your soaked buckwheat for several days in the fridge.
Coconut yogurt, chia seeds, goji berries, pumpkin seeds, soaked buckwheat, cacao nibs, hemp seeds

Coconut yogurt, chia seeds, goji berries, pumpkin seeds, soaked buckwheat, cacao nibs, hemp seeds

BUCKWHEAT BREAKFAST BOWL

  • Take out a medium sized bowl.
  • Spoon in some yogurt.  I like plain coconut yogurt.
  • Add a few spoonfuls of soaked buckwheat.
  • Dice up a half or a whole fruit.  Banana, pear, apple or mango work well.  If fruit isn't in season, then sprinkle in some goji berries, raisins or frozen berries.
  • The rest of these are optional, but I like to throw in a bunch of them:
    • Hemp seeds
    • Cacao nibs
    • Chia seeds
    • Nuts or seeds - I like walnuts or pumpkin seeds
    • You can also drizzle on secret potions, powders or oils.  Or maple syrup if you have a sweet tooth.
  • Mix it all up and breakfast is served.